Hey there, flower enthusiasts! So, you’re looking to dive into the world of flower drying, huh? Well, you’ve come to the right place. Whether you’re wanting to preserve those birthday bouquets, create some killer DIY decor, or just pick up a new hobby, this “flower drying for beginners tutorial” is here to keep your craft game strong. So grab some blooms, and let’s get creative!
Read Now : How To Spot Seasonal Flower Species
Why Flower Drying Rocks for Newbies
Alright, let’s talk about why you should totally try flower drying. For starters, it’s super fun and a little artsy. No stress, just chill vibes. You opt for flower drying for beginners tutorial when you want your flowers to stick around longer. Plus, dried flowers look so cool for home decor. More than just pretty trinkets, they bring good vibes, like a never-ending summer. You don’t need a ton of fancy stuff, either. Just some patience and a little know-how, which I’m here to spill. Imagine, turning those fresh petals into lasting keepsakes. Rad, right?
So, you might wonder, how hard is this flower drying for beginners tutorial gig? Spoiler alert: it’s totally do-able! It’s all about technique and timing. You get to experiment with what works for you. And even if it’s not perfect the first time, it’s rewarding to see how this ancient craft can turn your floral faves into long-lasting art. Plus, it makes you look super creative when guests stop by! Trust me, once you start, you’ll be hooked on capturing the essence of nature in such a timeless way.
Flower drying isn’t just a hobby; it’s an adventure. This flower drying for beginners tutorial will lead you through the ups and downs of drying everything from peonies to daisies. Before you know it, you’ll turn your kitchen into a flower lab! Go get your flower fix because, seriously, who needs fresh when you’ve mastered the art of dried blooms? Let the craft journey begin!
How To Get Started
Wanna get started with this flower drying for beginners tutorial? First up, snag some fresh flowers. Hydrangeas or roses? Your choice! Next, hang them upside down in a dry spot. Easy peasy, right? This helps the flowers stay in shape while losing moisture—it’s like a flower spa day!
Now, get yourself some silica gel if you are ready for a fancy-dancy way. This stuff is basically flower gold! Submerge your flowers in the gel, wait a few days or more, and voila! You’ve preserved their colors perfectly. Total game changer, guys.
Oh, and here’s a pro tip for your flower drying for beginners tutorial: collect your flowers after the morning dew dries but before evening. This ensures you trap their best look. Seriously, timing is everything! It’s like Instagram likes, but for flowers.
Picking Your Flowers
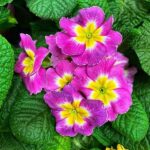
Picking your flowers is like curating a mini garden inside. For your flower drying for beginners tutorial, choose flowers that are in great condition. The fresher, the better, fab for preserving those vibrant hues. Check if they’re free from blemishes—like, no one wants a sketchy-looking dried flower!
Your next step is crucial: diversity. Don’t stick to just one type. Mix it up with roses, daisies, and lavenders for an eclectic dried bouquet. Trust me, a variety of shapes and textures ups your dried flower game to awesome levels. It’s all about the flower bouquet vibes!
Once you’ve got your lineup, make sure to prepare them right. Cut the stems to your desired length and remove excess leaves. Get rid of unwanted hitchhikers—the bugs. Prepping ensures your flower drying for beginners tutorial journey goes off without a hitch. Let’s make those blooms everlasting!
Different Methods To Dry Flowers
The Hanging Method
The hanging method is like the OG of flower drying. It’s super simple and doesn’t require much. For this part of your flower drying for beginners tutorial, you’ll need dark, dry space—like a closet. Just gather your flowers in small bunches, tie them together, and hang them. No fuss, no mess!
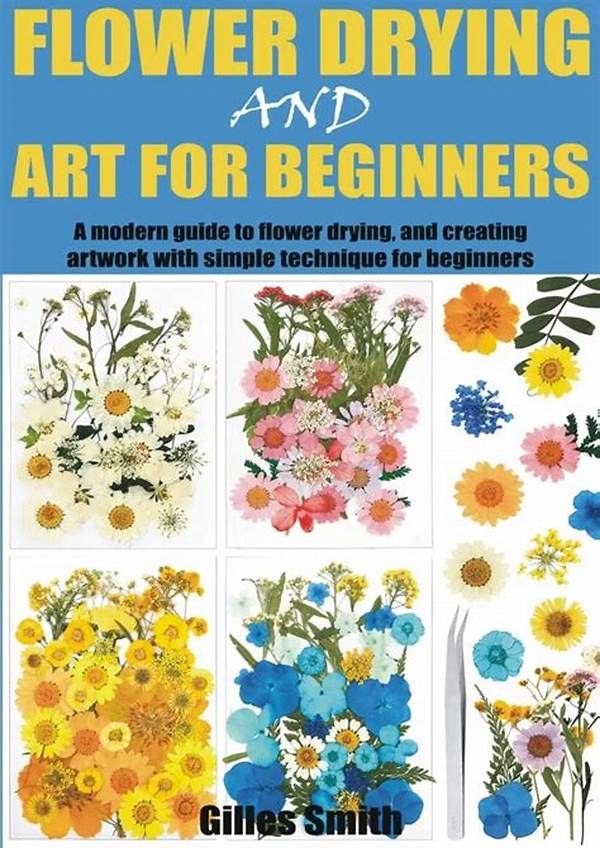
Pressing Flowers
Pressing flowers is all about going flat. Perfect if you’re into journals or scrapbooks. It’s a classic part of a flower drying for beginners tutorial. Just place flowers between parchment, pop them under something heavy, and bam! Flattened floral goodness.
Read Now : Crafting Flower Wraps From Reused Resources
The Silica Gel Technique
If you want vibrant dried blossoms, silica gel is your jam. This flower drying for beginners tutorial method keeps petals near their prime colors. Just bury the blooms in this magic dust and wait. The result? Stunningly preserved flowers that scream craft MVP!
Microwaving Flowers
Here’s a speedy hack for your flower drying for beginners tutorial: the microwave! It’s quick and decent if you’re in a hurry. Just nuke the flowers on low power with a microwave-safe bowl. Keep an eye out, though—nobody wants crispy, burnt flowers!
Oven Drying
Last up, we’ve got the oven. Think of it as flower baking but with less sugar. Place blooms on a tray, bake on low heat till done—it’s that simple. Your home will smell floral fabulous while you conquer this flower drying for beginners tutorial technique.
Choosing the Perfect Spot
Getting your drying location right is vital for a successful flower drying for beginners tutorial. Pick a dark, airy spot, away from the ninja dust particles. No one wants dust-bombed artwork! This ensures those colors stay poppin’ as the blooms dry in peace.
Caring For Your Dried Flowers
Taking care of those newly dried flowers is just as important. During this flower drying for beginners tutorial, once the drying’s done, think about where you’ll place them. Avoid direct sunlight; trust me, sun bleaches faster than a white shirt in the rain. Position those beauties where they’ll be admired but not fried.
Dust can be a dried flower’s worst enemy. To maintain their charm, gently spruce them up with a soft brush now and then. It’s just a little TLC that goes a long way. Also, keep humidity in check—a damp spot is not a friend to your dried assets.
Now you’ve mastered the flower drying for beginners tutorial! Show off those creations, whether it’s in a fancy vase or a unique wall art piece. Where will your dried flower journey take you next? Can’t wait to see what you’ll create next in this artsy adventure!
Tips and Tricks
The Decorative Touch
Decorating with dried flowers adds that timeless elegance to any room. In your flower drying for beginners tutorial, consider mixing textures and colors for a visually stunning display. Whether it’s boho or chic, dried flowers are versatile enough to fit any style. Show off your blooms in vases, wreaths, or frameless frames!
Quick Wrap-Up
So there you have it! You’re now a pro on this flower drying for beginners tutorial journey. Remember, each dried flower has a story, an adventure from fresh bloom to eternal beauty. Hold onto their memories. There’s no going back once you catch the dried flower bug—welcome to the dried side, folks!